
Logopack Studio
Logopack Studio is a free Mac app that turns a single SVG into a complete logo pack: SVG, PNG and PDF for screens, CMYK PDF and EPS for print, and a timestamp as proof. This guide shows how to build the pack and upload it to Visualbook.
What you will have
You will have a folder with the logo in every version, color variant and format, ready to hand to a client and to upload to the manual.
Steps
Download and install the app
On the Logopack Studio page, click the download button. Open the DMG and drag the app into Applications. You need macOS 14 or later. The app is free, with no subscription. It offers new versions on its own; to check manually, choose Check for Updates… in the app menu.
Add the logo as an SVG
On the welcome screen, drag an SVG onto Drop your logo to start, or create a project with New Project… and use Import SVG. You can also copy the logo in Illustrator or Affinity Designer and paste it with Cmd+V (Paste). Each additional SVG opens in a new tab.
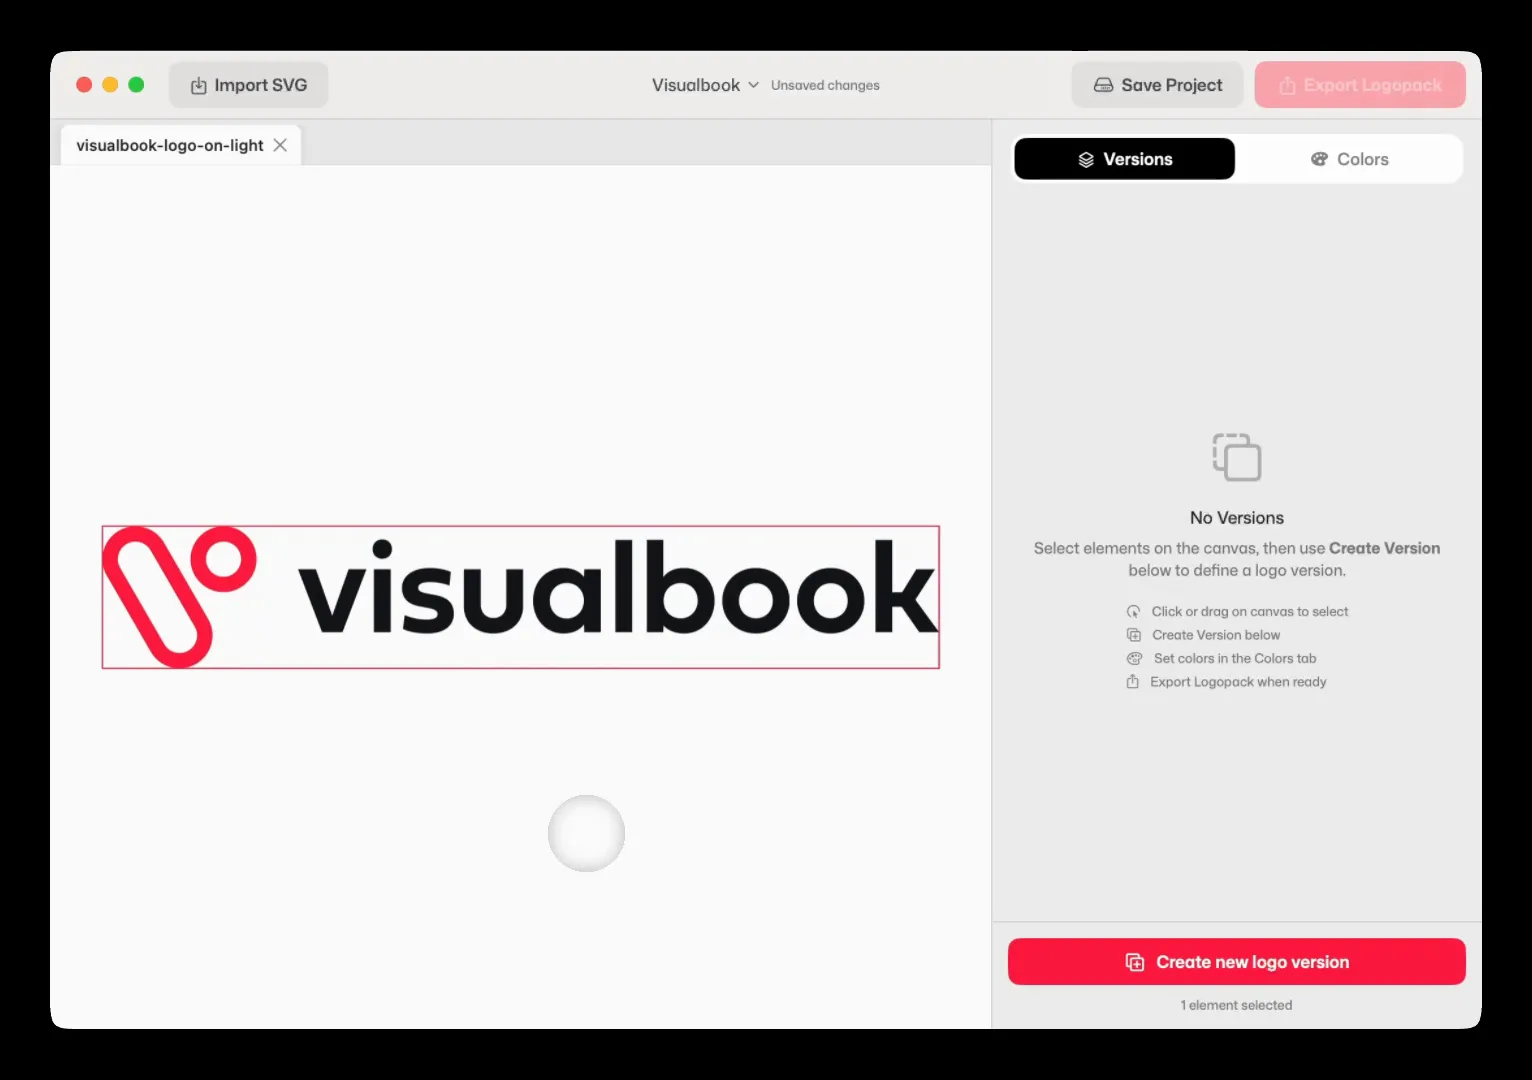
The logo imported from SVG. Create logo versions
On the canvas, select the elements that make up one version – click, Shift-click for several, or drag a marquee. In the Versions panel, click Create new logo version, name the version (for example “Main logo” or “Symbol”) and confirm with Create. Every new version gets four color variants: Light background, Dark background, Black and White.
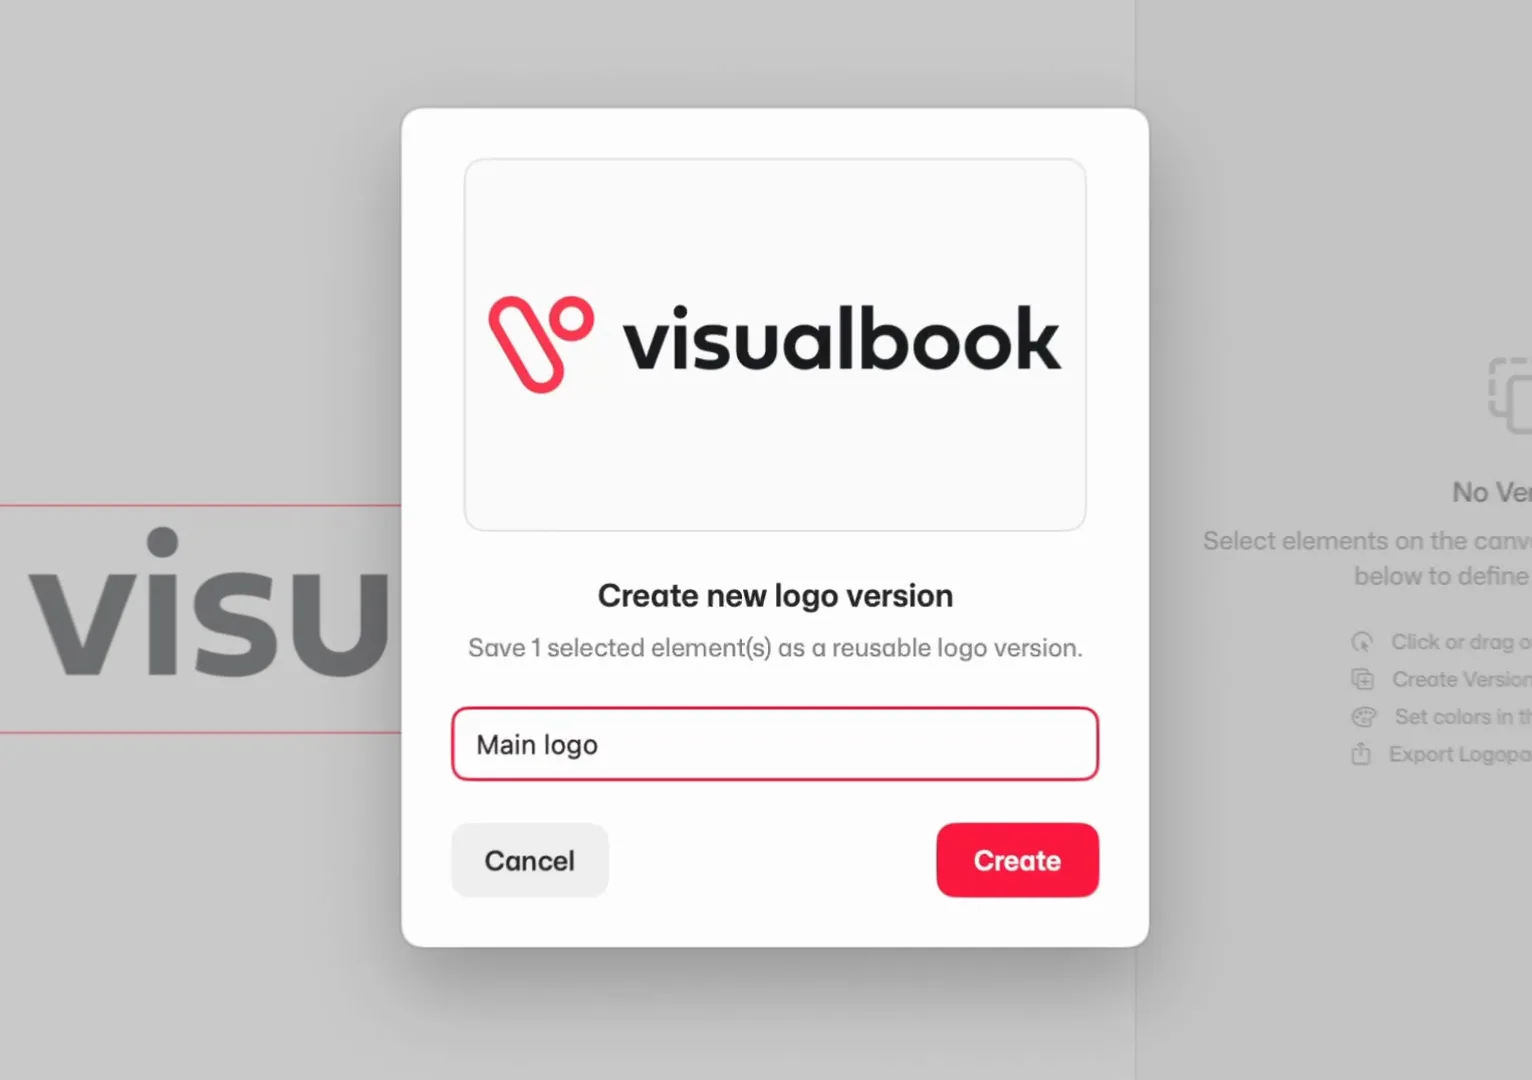
A new logo version from the selected elements. Check the colors
In the Colors panel, go through the color variants of each version. You can adjust the colors and enter custom CMYK values for print. Add color variant adds a single-color variant, for example Pantone 485 C converted to HEX.
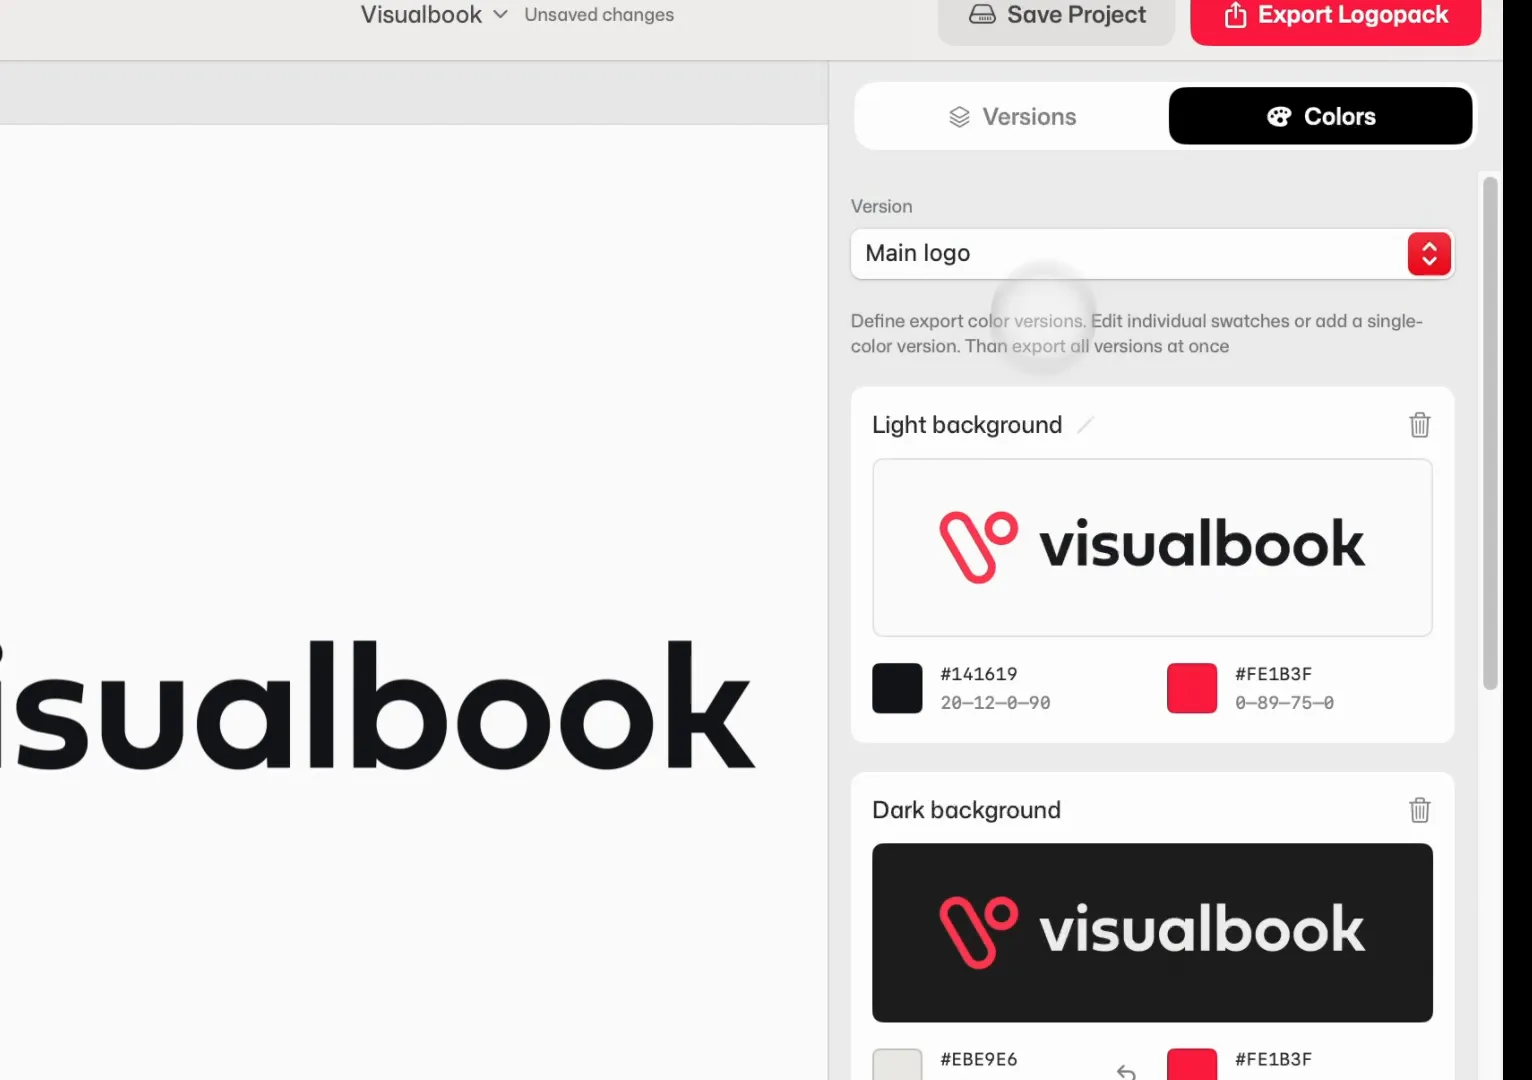
Color variants for light and dark backgrounds. Save the project
Click Save Project and save the project, for example as
Company.logopack. You can’t export a project until it is saved.Set up the export
Click Settings. The settings are stored with the project, and under Project you can save them as a preset for other projects.
- Formats – screen formats (SVG, PDF, PNG) and print formats (CMYK PDF and EPS); PNG sizes 256, 512, 1024 and 2048 px or custom.
- Folders – the destination folder and the subfolder structure.
- Naming – names of the color variants, for example in your own language.
Export the pack
Click Export Logopack. If no destination folder is set yet, the app asks for one. When the export finishes, you see Export complete with the number of files and a Reveal in Finder button.
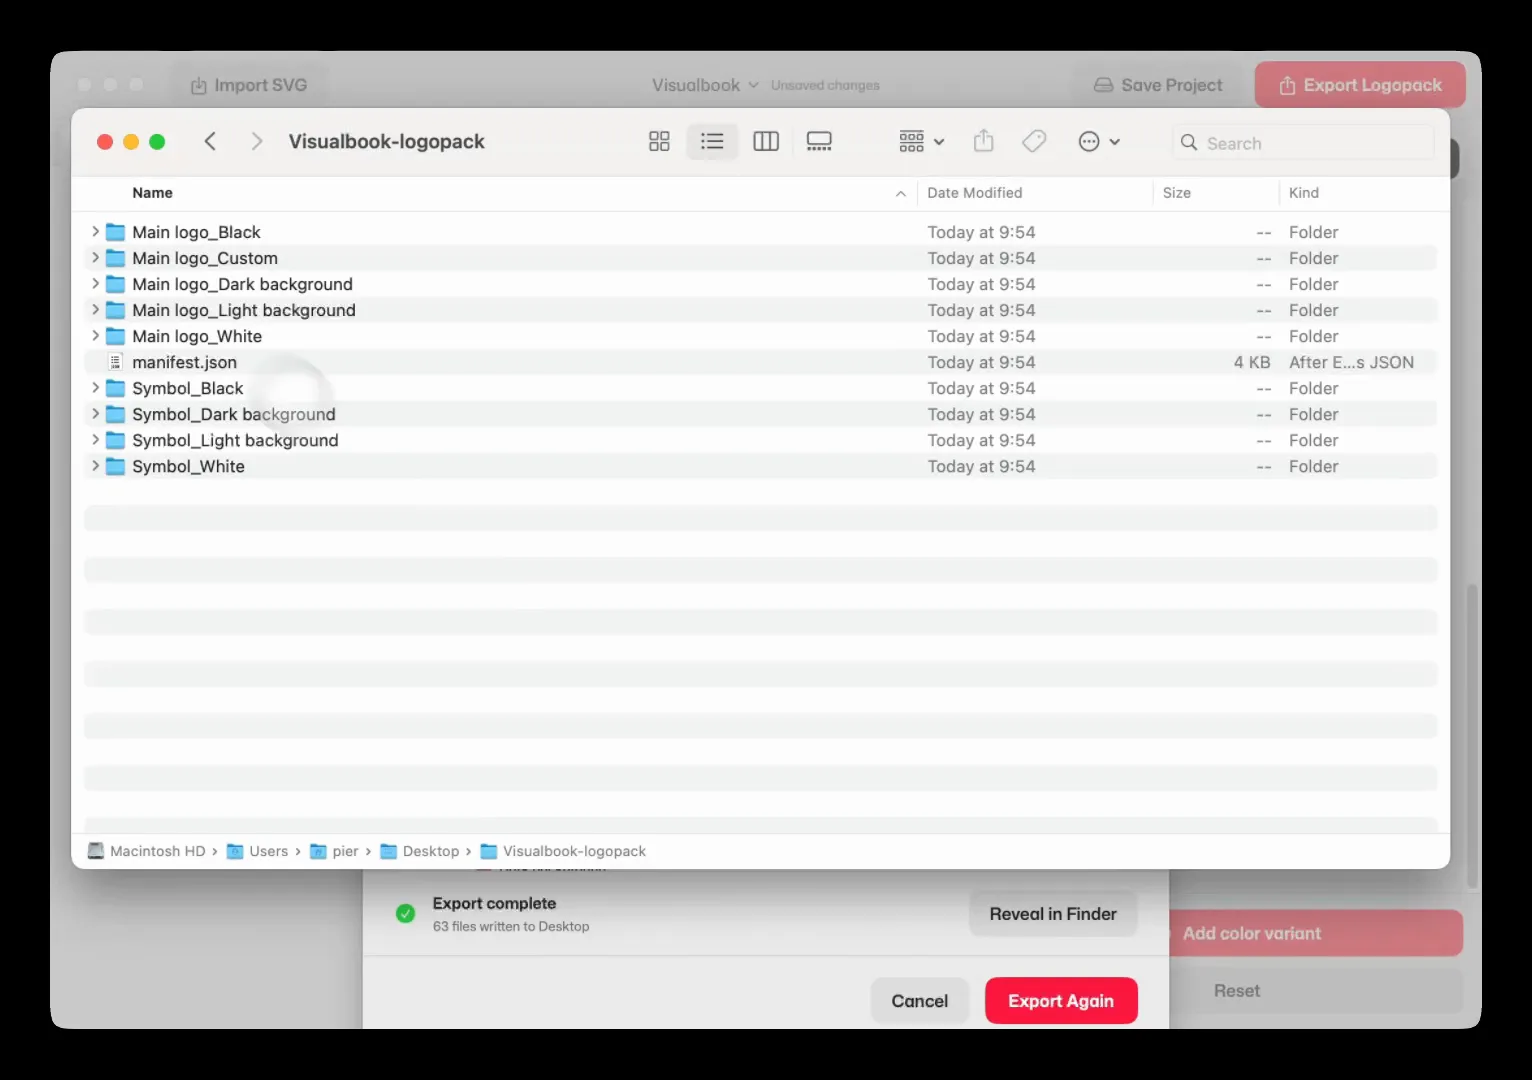
The finished pack in Finder.
How to tell it worked
The destination folder holds a set of files in the chosen formats for every version and color variant, a manifest.json describing the pack and a timestamps/ folder with the timestamps.
What’s in the pack
| File | Use |
|---|---|
| SVG | web, apps, uploading to Visualbook |
| PDF (RGB) | digital documents and presentations |
| PNG 256–2048 px or a custom size | office software, social media, email |
| CMYK PDF and EPS | print – colors in DeviceCMYK, no external tools needed |
manifest.json | a machine-readable description of the pack and its colors |
timestamps/ (.svg and .ots) | proof that the logo version existed at a given time |
The timestamp (Digital Proof)
Every logo version is timestamped automatically the moment you create it. A SHA-256 fingerprint of the SVG’s exact bytes is anchored in the Bitcoin blockchain via the OpenTimestamps servers. Open the list of timestamps with the Digital Proof button.
- Awaiting Bitcoin confirmation – the fingerprint has been sent and is waiting to be included in a block, which usually takes a few hours. Timestamps update on their own when you open the project.
- Confirmed – the timestamp is permanently anchored and the proof is final.
The .svg and .ots files in the timestamps/ folder work without the app – anyone can verify them with any OpenTimestamps tool.
Upload the pack to Visualbook
The app doesn’t connect to Visualbook by itself – you upload the files to the manual. In the panel, open the page of the specific logo and:
- Upload the light and dark background SVGs to Logo on a light background (SVG) and Logo on a dark background (SVG).
- Upload the CMYK PDF and EPS to CMYK on a light background and CMYK on a dark background.
- Zip the whole exported folder. In Logopack source, choose File download and upload the ZIP to Logo pack (.ZIP). Alternatively, put the folder on a shared drive, choose External link and paste the address into Logopack link.
- Click Save.
Details in Logos and Logo formats for download. Your AI agent can also help you upload and sort the files – see What the agent can do.
The interface is in English
Questions and answers
Do I need Visualbook to use the app?
No. Logopack Studio is free and works on its own. You can hand the pack to a client as a folder or upload it to their Visualbook.
Does it run on Windows?
No, only on a Mac with macOS 14 or later.